
How to Create a Home Recording Studio on a Budget
February 22, 2024
How to Create a Home Recording Studio on a Budget
Creating a home recording studio doesn't have to break the bank. With careful planning and budgeting, you can set up a space that allows you to record, mix, and produce quality audio without spending a fortune. In this guide, we'll walk you through the essential steps to create a home recording studio on a budget.
1. Define Your Needs and Budget
Before you start purchasing equipment, it's important to define what you need from your home recording studio. Are you recording vocals, guitars, or full bands? Knowing your needs will help you prioritize your purchases. Also, set a budget and try to stick to it.
2. Choose the Right Space
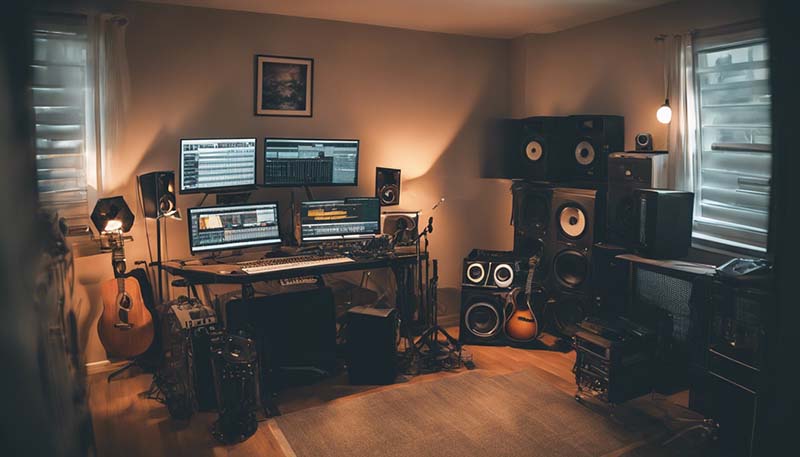
The space you choose for your home recording studio can greatly affect the quality of your recordings. Look for a room that is relatively quiet and free from outside noise. Carpeted floors and soft furnishings can help absorb sound, reducing echoes and unwanted noise.
2.1 Acoustic Treatment
Even on a budget, there are ways to improve the acoustics of your space. Thick curtains, acoustic foam panels, and even bookshelves filled with books can help dampen sound and reduce reflections.
2.2 Room Size and Shape
A small room can work well for a home recording studio, but be aware of the potential for sound to bounce around in larger, more open spaces. If possible, choose a room with a less than perfect square shape to minimize standing waves.
3. Essential Equipment
There are a few pieces of equipment that are essential for any home recording studio. Here's a list of the basics you'll need:
3.1 Audio Interface
An audio interface is the heart of your home recording studio. It converts the analog signals from your instruments and microphones into digital signals that your computer can process. Look for an interface with at least one or two inputs to start with.
3.2 Microphones
A good quality microphone is crucial for capturing clear, clean recordings. Start with a large diaphragm condenser microphone for vocals and acoustic instruments, and consider a dynamic microphone for louder sources like amplifiers or drums.
3.3 Studio Monitors
Studio monitors are designed to provide an accurate representation of your audio, without any coloration or distortion. Even budget monitors can be a significant upgrade over typical consumer speakers.
3.4 Headphones
Invest in a pair of closed-back headphones for monitoring your recordings. They will help you focus on the details of your mix without disturbing others in your home.
3.5 MIDI Controller
If you plan on working with software instruments or virtual synthesizers, a MIDI controller can be a valuable addition to your studio. Look for one with at least 25 keys, and consider the feel and build quality.
3.6 Cables and Stands
Don't forget about the cables and stands you'll need to connect and position your equipment. XLR cables for microphones, TRS cables for instruments, and USB cables for your audio interface are all essentials.
3.7 Software
There are many Digital Audio Workstations (DAWs) available, some of which are free or very affordable. Choose a DAW that suits your needs and is compatible with your computer's operating system.
4. Recording Techniques
Even with budget equipment, good recording techniques can make a significant difference in the quality of your recordings. Learn about proper microphone placement, gain staging, and the use of EQ and compression to enhance your recordings.
4.1 Microphone Placement
Experiment with different positions for your microphones to find the best sound. For vocals, try placing the mic slightly off-axis to reduce plosives and sibilance.
4.2 Gain Staging
Proper gain staging can help you achieve a clean, strong signal without clipping or distortion. Start by setting the input gain on your audio interface to achieve a good level, and then use your DAW's software gain controls to make further adjustments.
4.3 EQ and Compression
Learn to use EQ and compression to shape the sound of your recordings. EQ can help you carve out space in the mix for different instruments, while compression can add punch and sustain to your tracks.
5. Expand Your Studio Gradually
As you become more comfortable with your home recording studio, you may want to expand your setup with additional equipment. Consider adding more microphones, a better preamp, or a new piece of outboard gear.
5.1 Additional Microphones
Having a variety of microphones can give you more options when recording different sources. Look for deals on used microphones or consider renting before you buy.
5.2 Outboard Gear
Outboard gear like compressors, equalizers, and preamps can add character and depth to your recordings. Start with one or two high-quality pieces and use them on your most important tracks.
5.3 Storage and Organization
As your collection of equipment grows, you'll need a way to store and organize everything. Consider investing in a studio cart or rack system to keep your gear organized and accessible.
6. Keep Learning and Experimenting
The world of home recording is constantly evolving, with new techniques and technologies emerging all the time. Stay informed about the latest developments and don't be afraid to try new things in your recordings.
6.1 Online Resources
There are countless online resources available to help you learn more about home recording. Look for tutorial videos, online courses, and forums where you can ask questions and get feedback on your work.
6.2 Networking
Connect with other home recording enthusiasts, either online or in your local area. Networking can provide valuable insights, feedback, and even collaboration opportunities.
6.3 Practice
The more you record, the better you'll become. Practice regularly and experiment with different techniques and settings to find what works best for you.
Conclusion
Creating a home recording studio on a budget is entirely possible with some careful planning and resourcefulness. By starting with the essentials and gradually expanding your setup, you can create a space that allows you to produce professional-quality recordings without spending a fortune. Remember to keep learning and experimenting, and most importantly, enjoy the process of creating music in your own space.

Comment